
Super Advanced – Tile Roofing
SERVICE OVERVIEW
Fair and Square LLC is a Florida licensed contractor with extensive experience in the installation of clay and concrete tile roofs.
The Difference Between Clay and Concrete Tile
Clay roof tiles are durable, strong and resistant to all weather conditions. They are baked in kilns at extremely high temperatures, which allow the tiles to retain their strength and color for up to 100 years. Clay tiles are available in an array of shapes, sizes and textures, and in many fade-free colors.
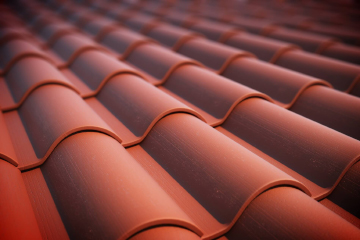
Concrete roof tiles have become a very popular choice due to their durability and lower cost. The average lifespan of concrete tiles is about 50 years, and cost is likewise about half that of clay tiles. Concrete tile is a very durable and fire-resistant roofing material, and available in a wide range of colors and design
Tile is one of the most affordable, long-term roofing solutions on the market. Not only does tile deliver long-lasting value, it adds curb appeal and increases property value. Low maintenance, energy-saving and aesthetic appeal make roof tile the best overall value in roofing products.
Roof tile is offered in an extensive range of styles and colors to compliment any architectural design. From traditional Spanish barrel tile profiles, to low-profile shake and slate products.
Most tile roofs have warranties ranging from 40-50 years, though some clay tile roofs in Europe have lasted hundreds of years.
Here are more advantages of this roofing material.
- Superior durability and long service life
- Low maintenance requirements and lifecycle cost
- Wide choice of colors and patterns
- Excellent insulating properties for energy savings
- Fireproof with a Class-A rating
- Environmentally friendly
POPULAR QUESTIONS
A: Ridge vents are great, but I’d avoid them in this case. Your roof has a fairly low pitch, and snow (or rain) could blow into the attic through the vent. So unless you’ve noticed signs of ventilation problems, such as ice damming in the winter or roof shingles bubbling and curling from overheating in the summer, I think you should stay with your existing arrangement.
By the way, 4:12 is about the minimum slope suitable for asphalt or fiberglass shingles. To improve the weather protection, I’d reduce the maximum exposure of the shingles from 5 to 4½ inches, and I’d use six nails per shingle instead of the standard four.
A: It’s always tricky to pinpoint the exact location of a leak. It may appear to originate in one area, but water is sneaky and moves in unexpected paths. So before you jump into this job, try to determine where the leak is coming from. If the porch has a finished ceiling, for example, remove a few boards and check the underside of the roof sheathing for water stains—they may help pinpoint the leak’s location. In the case of a low-pitched roof, you may have no alternative but to remove all the roofing just to track down the problem.
Chances are, the leakage is probably due to the flashing, not the roofing material itself. Damaged, corroded, or improperly installed flashing is a common problem at this location (and a lot of other locations, too). If the roofing material is in good condition, you may have to remove an area of siding as well as some of the roofing to replace any damaged flashing. (Generally, the only reason to remove all of the roofing would be if it’s nearing the end of its useful life anyway.) A capable roofing contractor should be able to make this repair for you.
Resist the temptation to turn the problem over to a handyman with a bucket of tar. You might save some money in the short run, but slathering roofing tar on the flashing doesn’t really fix the problem, and can actually accelerate corrosion by trapping moisture between the tar and the metal.
If it does turn out that the roofing is shot and has to be removed, you should have the flashing replaced at the same time. There’s no point trying to protect a new roof with old flashing.
A: The black mold-like stains and streaks that appear on roofs, particularly light-colored asphalt shingles, is actually a blue-green algae (Gloeocapsa magma). Commonly found in climates with warm, humid summers, it does no damage to the roofing, but it certainly does looks bad.
You could replace all the roofing with new shingles dark enough to disguise the staining, or with shingles laced with copper granules, which are lethal to algae. But that would only make sense if the shingles were worn out.
The less expensive solution is to spray wash the roof with a 50 percent mix of water and bleach to get rid of the algae. (No pressure washers, please. They’re likely to damage the shingles.) Just be sure to wet your foundation plantings first, and rinse everything in clean water when you’re done. Plants don’t like bleach, and wetting them with plain water first protects them.
To keep the algae from coming back, insert 6-inch-wide strips of zinc or copper under the row of shingling closest to the roof peak, leaving an inch or two of the lower edge exposed to the weather. That way whenever it rains, some of the metal molecules will wash down the roof and kill any algae trying to regain a foothold on your shingles.
You can probably see this same principle working on roofs in your neighborhood. Look for chimneys with copper flashing; the areas directly below the flashing will be free of any algae stains.
The strips also work on roofs suffering from moss buildup. Just scrub it off first with a brush, then bleach as above.